Albums
The Albums manager allows you to create and manage interactive photo albums.
Who has access:
You must have one of the checked permissions to use this manager.
Guest
Member
Contributor
Editor
Administrator
Albums Coordinator

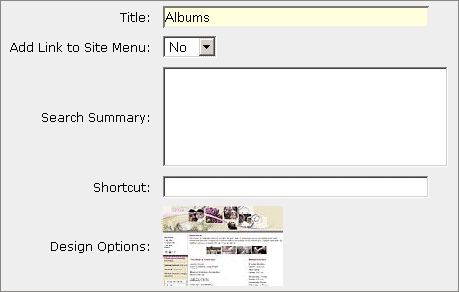
- TITLE: Enter a title for your Albums manager section. This title will appear on your main menu should you choose to display the link.
- ADD LINK TO SITE MENU: Select "Yes" from the drop down menu to display the link on your menu. Select "No" from the drop down menu to not display the link on your menu.
- SEARCH SUMMARY: Enter descriptive information to be used for Search Engine data and Site Search data.
- SHORTCUT: This allows you to make a shortcut to your Albums manager page. It will be a one word entry (i.e. albums). It can be accessed on the Web by typing in www.yourdomainname/shortcutname. (For example: www.yourdomain.com/albums).
- DESIGN OPTIONS: Click the design option that is currently shown. A window will appear with the other designs you made available in the Additional Designs section of your Designs manager. Select the design you want to apply to this page.
- Click the Save
 icon in the upper right corner of your screen to save your Albums manager settings.
- Add/Edit page contents using the Page Editor. For help with the functionality of the Page Editor, see Using the Editor for more information.
- Click the Save
 icon in the upper right corner of your screen to save your Albums manager page settings.
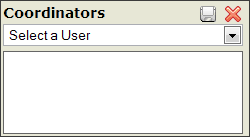 This feature is only applicable to those who have the People manager.
- Select an appropriate person from the drop down menu. The list of names that appear is populated from your People manager. The person must have an email address entered in your People manager in order to appear.
- Click the Save
 icon within the dialog box.
- Repeat steps 2 and 3 for each Coordinator you want to add.
- To delete a Coordinator, click the Delete
 icon to the left of the person's name.
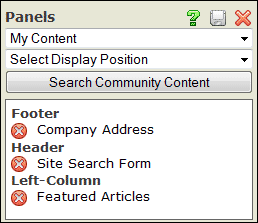 Add/Delete Panels
- Click the Panels tab.
- Using the first drop down menu, select the panel you wish to display.
- The panel you select will appear in the preview window at the bottom of the Panels dialog box.
- Using the second drop down menu, select the display position for the area you want the panel to appear on your site.
- Click the Save
 icon within the dialog box. Repeat this process for each panel you wish to add.
- To delete a panel placement, click the Delete
 icon to the left of the panel title.
Update Panel Position and Order
- Click the Panel Name
- Using the first drop down menu, select the display position for the area you want the panel to appear on your site.
- Using the second drop down menu, select the order in which you want the panel to display. By selecting "1", the panel will appear first within its assigned position. By selecting "2", the panel will appear second within its assigned position.
- Click the Save
 icon within the dialog box. Repeat this process for each panel you wish to update.
Search Community Content
- Click the Add New Album
 icon.
icon.
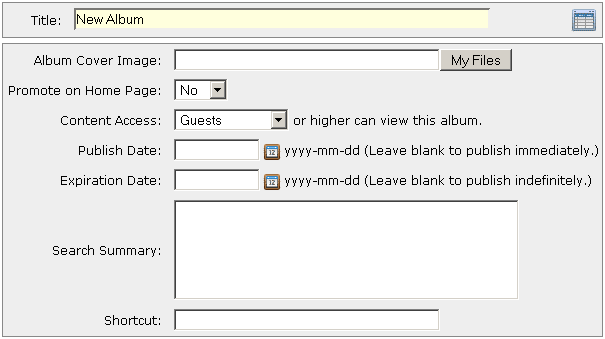
- TITLE: Enter a title for your album
- ALBUM COVER IMAGE: Click the My Files button located to the right of the text field to select a cover image for your Album. This image will appear on your Album listings page and will also be the first image to appear in your Album.
- PROMOTE ON HOME PAGE: Select "Yes" to automatically add a link to the album in the feature (Just For You) section of your home page.
- CONTENT ACCESS: This allows you to set the minimum security level required to view your album. For more information on setting access, see the People manager as this option will only appear to those who have the People Manager.
- Guest: This allows anyone who visits your site to view your album.
- Member: This allows only those who have Site Member access or greater to view your album.
- Site Contributor: This allows only those who have Site Contributor access or greater to view your album.
- Site Editor: This allows only those who have Site Editor access or greater to view your album.
- Site Administrator: This allows only those who have Site Administrator access to view your album.
- PUBLISH DATE: Click the calendar icon to the right of the Publish Date field to bring up the interactive calendar and choose the date that your album will be available to users. Leave the Publish Date field blank to make your album available immediately. Alternatively, you may click inside the Publish Date field to bring up the interactive calendar.
- EXPIRATION DATE: Click the calendar icon to the right of the Expiration Date field to bring up the interactive calendar and choose the date that your album will expire. The album will appear through the end of the date you select. The end time is determined by your Time Zone selection within the Home Page Settings area. Leave the Expiration Date field blank to make your album available immediately. Alternatively, you may click inside the Expiration Date field to bring up the interactive calendar.
- SEARCH SUMMARY: Enter descriptive information to be used for Search Engine data and Site Search data.
- SHORTCUT: This allows you to make a shortcut to a specific album. It will be a one word entry (i.e. trainingfacility). It can be accessed on the Web by typing in www.yourdomain.com/albums/shortcutname. (For example: www.yourdomain.com/albums/trainingfacility). Note: You must create a shortcut in the Manager Settings section of the Albums manager in order for the shortcut to the specific album to work.
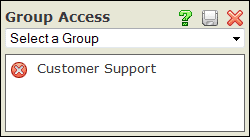
This allows you to make an album viewable only by users in the selected group or groups. The user must be granted Member access or greater within the group to see the album. For more information on setting access, see the
People manager.
- You must first setup your target groups in the Groups manager.
- Users must be assigned to the group to be included in the target groups. This can be done by the individual through setting his/her preferences at log in or by changing those preferences from your Web site's home page. You can also do this manually through the People manager.
- Choose the group you wish to grant access and click the Save
 icon in the upper right corner of the dialog box.
- To delete a group, click the Delete
 icon to the left of the group name.
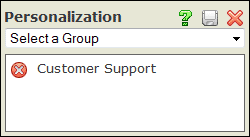
This allows you to limit promotion of this album's content on your Home page to specific groups. You must set Promote on Home Page to "Yes" to promote the album.
Note: This tab only appears if you have the
People and
Groups managers.
- You must first setup your target groups in the Groups manager.
- Users must be assigned to the group to be included in the target groups. This can be done by the individual through setting his/her preferences at log in or by changing those preferences from your Web site's home page. You can also do this manually through the People manager.
- Choose the group you wish to grant access and click the Save
 icon in the upper right corner of the dialog box.
- To delete a group, click the Delete
 icon to the left of the group name.

- TITLE: Give your image a title. This title will appear above your image within your Website.
- IMAGE: This shows the url or location of your image.
- Click the My Files button located to the right of the text field.
- Click the Upload Files button.
- Locate the image on your computer's hard drive.
- Select the image and click Open and the image will automatically upload to your My Files area.
- Select the image you just uploaded and click the Insert Selected button.
- Create/Edit a caption for your image using the editor. Creating a caption is not required. For help with the functionality of the Page Editor, see Using the Editor for more information.
- Click the Save
 icon in the upper right corner of your screen to save the image to your album.
Note: Our maximum recommended image size is 40KB. If you attempt to upload an image larger than 40KB, you will be prompted to resize your image if you choose to do so. For more information, please see our
Resizing Images section within the Help Manual.
- To add an additional image, click the Add
 icon in the upper right corner of your image list.
- To change the location where your image appears in the album, click the up/down arrow or position number and select the appropriate position within the drop-down list. Selecting "1" will set the image to appear first in your album. Selecting "2" will set the image to appear second in your album. The list will populate according to the number of images you have added.
- To delete an image or images, select the check box to the left of the Image ID and title.
- Click the Delete Selected
 icon in the upper right corner of your image list.
- To edit an existing item, click the ID number or image title.
- Delete an Album or Albums by selecting the check box to the left of the Album ID number.
- Click the Delete Selected
 icon. Once an Album is deleted, there is not a way to retrieve the album.
- Alternatively, you may click the Delete
 icon within the Album itself.


 This feature is only applicable to those who have the
  Add/Delete Panels
 This allows you to make an album viewable only by users in the selected group or groups. The user must be granted Member access or greater within the group to see the album. For more information on setting access, see the
  This allows you to limit promotion of this album's content on your Home page to specific groups. You must set Promote on Home Page to "Yes" to promote the album.
