People Management: Quick Links
People Management
The
People manager allows you to provide visitors the opportunity to strengthen their relationships with your organization by sharing valuable information that will help you stay in contact with them and better meet their needs.
Who has access:
You must have one of the checked permissions to use this manager.
Guest
Member
Contributor
Editor
Administrator
People Coordinator
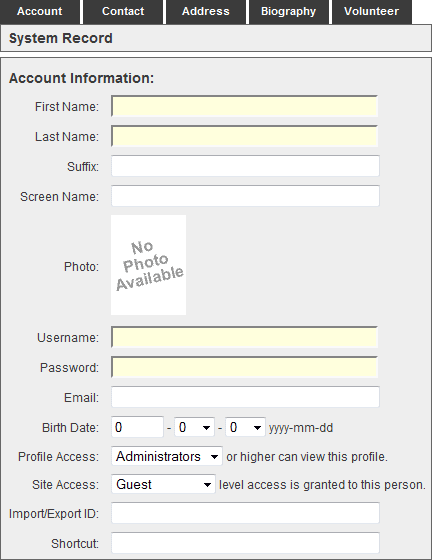 Account Information
- FIRST NAME: Enter the person's First Name.
- LAST NAME: Enter the person's Last Name.
- SUFFIX: If the person has a suffix associated with their name, enter it here. Examples include: "Jr."; "Sr."; "III"; "IV"
- SCREEN NAME: Displayed when making posts to the Discussions manager and adding comments to a channel within the Syndication manager. If you upload media to the Media manager, your screen name is also displayed with the piece of media.
- PHOTO: This is the photo associated with your Profile. Places where this appears include the Directory and E-zekiel.tv.
- USERNAME: To provide a better user experience and more flexibility in the future, all users must enter a valid email address for their username.
- PASSWORD: Enter the password the person will use to login to the site.
- EMAIL: Enter a contact email for the person.
- BIRTH DATE: Enter a Birth Date for the person.
- PROFILE ACCESS: Set the appropriate access level need to view this person's profile. The default access is Administrator.
- SITE ACCESS: When adding a person, you also set their site-wide access level. The levels of access to choose from are as follows:
- Guest: This allows a person to view content that has been setup for everyone to access.
- Member: This allows a person to view content that has been set to Member access and below.
- Contributor: This allows a person to view content that has been set to Contributor access and below. A Contributor can also create pages for your website. A site Editor or Administrator must approve any page created by a Contributor. Please visit the Page Approval section for more details.
- Editor: This allows a person to view content that has been set to Editor access and below. Editors can create pages for your website but do no require page approval. Editors can also access the Panels manager, Albums manager, Events manager, Resources manager, Syndication manager, Polls manager, Discussions manager, Communications manager, Volunteer manager and Media manager. Editors cannot access the Home page, Designs manager, People manager, Groups manager, Store manager, Requests manager, Statistics manager or Account manager.
- Administrator: This allows a person full access to the entire site. The site Administrator is responsible for making website and email account management decisions. This access level should be distributed sparingly.
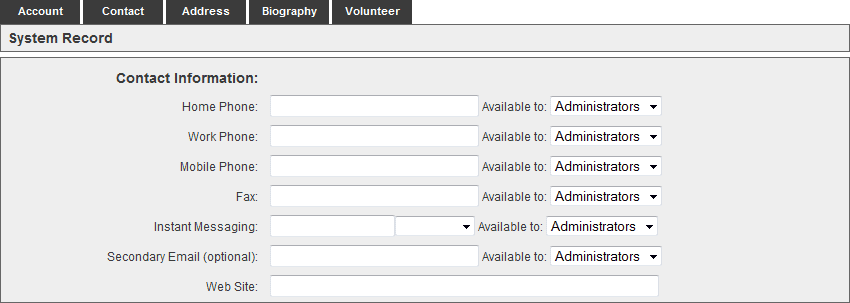
Contact Information
Enter basic contact information such as phone numbers, fax number, instant messaging data, a secondary email and a website address. Set the site-wide access level to determine who can see the person's contact information on your site.
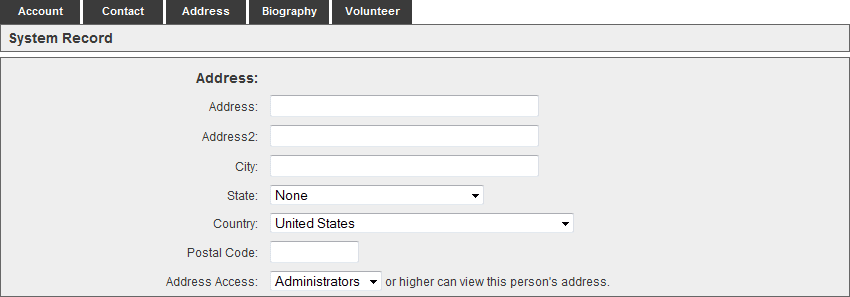
Address
Enter the person's address, city, state, country, and postal code. Set the site-wide access level to determine who can see the person's address information on your site.
Biography
Enter the person's biographical information using the simplified editor provided. Set the site-wide access level to determine who can see the person's biographical information on your site.
Volunteer Profile
Enter skills and certifications to be used in conjunction with the
Volunteer manager on your site.
After this information has been entered, click the Save

icon in the upper right corner of the screen.
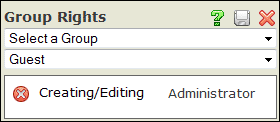
This allows you to assign a person's rights within a selected group or groups. The person must be granted Member access or greater within the group to see targeted content, but can be assigned Guest rights within a group for personalization purposes. You must have the
Community Builder for the access level drop down menu to appear. If just the group selection drop down menu appears, the person will be granted Guest access in the group by default.
- First, setup target groups in the Groups manager.
- Within the person's record, select the group you wish to grant access.
- Select the access level you wish to assign to the person.
- Click the Save
 icon in the upper right corner of the dialog box.
- To delete a group, click the Delete
 icon to the left of the group name.
 Click the browse button next to the type of file you would like to insert.
- Find the file your computer's hard drive.
- Highlight the file name and then click open.
- The file's location should appear in the text box. (Note: Each person may only have 1 Photo, 1 Family Photo and 1 File. Uploading additional files will overwrite the original.)
- Click the Save
 icon within the dialog box to upload the file(s).
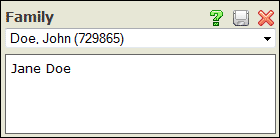
By associating Family members with the head of the household the People manager will automatically create a family and associate the members of the family together.
- Click on the Family tab.
- Choose the head of the household from the drop-down menu.
- Should your selection have related family members, they will be listed within the dialog box. Clicking the person will take you to their People Record.
- Click the Save
 icon within the dialog box.
- To change the head of household, repeat steps 2 and 4 above.

This allows you to move the External ID and assigned groups from an imported person to a created person. You can also merge duplicate, created people into one record.
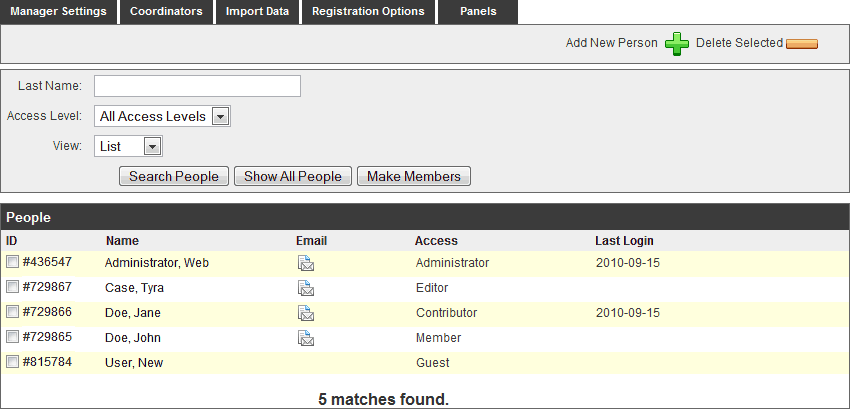
- Search for the person you need to update using the Search People controls or by selecting the Show All People button.
- Click the person's ID number or name to access their information.
- Make any changes necessary and click the Save
 icon in the upper right corner of the screen when finished.
Please Note:
To provide a better user experience and more flexibility in the future, all users must enter a valid email address for their username. If the existing username is not an email address, the system will automatically reset it to the email address on record.
- Delete a person or people by selecting the check box to the left of the person's name.
- Click the Delete Selected
 icon. Once a person is deleted, there is not a way to retrieve their record.
- Alternatively, you may click the Delete
 icon within the people record itself.
 Account Information


 This allows you to assign a person's rights within a selected group or groups. The person must be granted Member access or greater within the group to see targeted content, but can be assigned Guest rights within a group for personalization purposes. You must have the
  Click the browse button next to the type of file you would like to insert.
 By associating Family members with the head of the household the People manager will automatically create a family and associate the members of the family together.