Event Scheduling: Quick Links
Event Scheduling
After you have entered your event information and saved, an Event Schedule dialog box will appear. If you choose not to schedule an event, it will not appear on your calendar or event listing.
Who has access:
You must have one of the checked permissions to use this manager.
Guest
Member
Contributor
Editor
Administrator
Events Coordinator
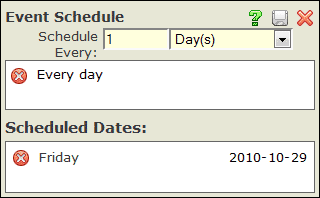
If your event is going to be a one day only event, you will need to setup your Event Schedule as follows:
- SCHEDULE EVERY: In the text box to the left of the drop down menu, enter the number 1 since this event will only occur for one day.
- From the drop down menu, select Day(s).
- Click the Save
 icon within the dialog box when finished.
- The scheduled day now appears in the Scheduled Dates box just below the Event Schedule box.
- To delete this schedule, click the Delete
 icon to the left of the words "Every day."
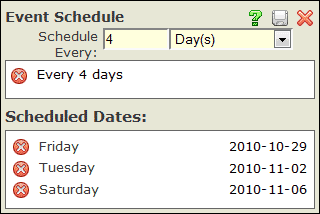
You may want to schedule your event to repeat over a certain period of days. If this is the case, you will need to setup your Event Schedule as follows:
- SCHEDULE EVERY: In the text box to the left of the drop down menu, enter the number for the days you want the event to repeat.
- From the drop down menu, select Day(s).
- Click the Save
 icon in the dialog box when finished.
- The schedule now appears in the Scheduled Dates box just below the Event Schedule box.
- In the example to the right, the event is scheduled to repeat every 4 days.
- To delete the schedule in this example, click the Delete
 icon to the left of the words "Every 4 days."
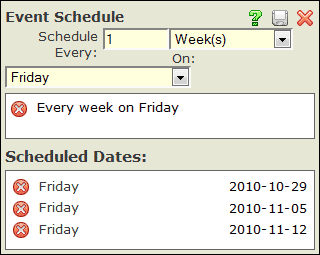
You may want to schedule your event to repeat on a certain day each week. If this is the case, you will need to setup your Event Schedule as follows:
- SCHEDULE EVERY: In the text box to the left of the drop down menu, enter a number for the weeks you want to repeat the event. For example, enter 1 if the event repeats every week or enter 2 if the event should repeat every other week.
- From the drop down menu, select Week(s).
- You will now see a second drop down menu. Select the day of the week the Event will occur.
- Click the Save
 icon in the dialog box when finished.
- The schedule now appears in the Scheduled Dates box just below the Event Schedule box.
- In the example to the right, the event is scheduled to repeat every week on Friday.
- To delete the schedule in this example, click the Delete
 icon to the left of the words "Every week on Friday."
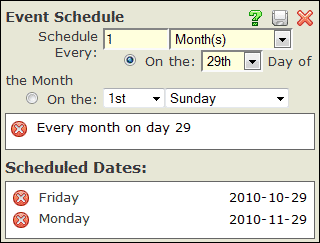
You may want to schedule your event to repeat on a specific day of each month. If this is the case, you will need to setup your Event Schedule as follows:
- SCHEDULE EVERY: In the text box to the left of the drop down menu, enter a number for the months you want to repeat the event. For example, enter 1 if the event repeats every month or enter 2 if the event should repeat every other month.
- From the drop down menu, select Month(s).
- Click the first radio button as shown in the example on the right.
- Select the day of the month on which the event should repeat.
- Click the Save
 icon in the dialog box when finished.
- The schedule now appears in the Scheduled Dates box just below the Event Schedule box.
- In the example to the right, the event is scheduled to repeat every month on the 29th of the month.
- To delete the schedule in this example, click the Delete
 icon to the left of the words "Every month on day 29."
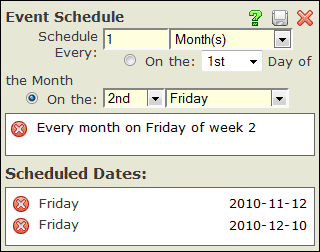
You may want to schedule your event to repeat on a specific day of the week, each month. If this is the case, you will need to setup your Event Schedule as follows:
- SCHEDULE EVERY: In the text box to the left of the drop down menu, enter a number for how often you want the event to repeat. For example, enter 1 if the event repeats every month or enter 2 if the event should repeat every other month.
- From the drop down menu, select Month(s).
- You will now see a second radio button and 2 additional drop down menus.
- Select the second radio button and then choose your repeat schedule.
- Click the Save
 icon in the dialog box when finished.
- The schedule now appears in the Scheduled Dates box just below the Event Schedule box.
- In the example to the right, the event is scheduled to repeat every month on the 2nd Friday of the month.
- To delete the schedule in this example, click the Delete
 icon to the left of the words "Every month on Friday of week 2."
- Select the schedule from the Event Schedule box.
- Update the current settings of the selected schedule by changing the information that appears.
- Click the Save
 icon in the dialog box when finished.
Click the Delete

icon to the left of the schedule frequency within the Event Schedule box.
Click the Delete

icon located to the left of the date listed in the Scheduled Dates box.
- Click on a specific date listed in the Scheduled Dates box and confirm by clicking OK.
- This will create a new event based on the current event and allow you to update the event's information.