Opportunities: Quick Links
Volunteer Opportunities
Using the
Volunteer manager, you can create volunteer opportunities by grouping them together within a
project or as stand-alone opportunities unrelated to a
project.
Who has access:
You must have one of the checked permissions to use this manager.
Guest
Member
Contributor
Editor
Administrator
Volunteer Coordinator
Click the Add New Opportunity

icon.
Note: A volunteer opportunity created within a project will inherit the project default settings. You can override project settings by updating the settings within the opportunity itself.
- TITLE: Enter the title of the opportunity.
- CONTACT NAME: Enter the name of the opportunity contact.
- CONTACT EMAIL: Enter the email address for the opportunity contact.
- CONTACT PHONE: Enter the phone number for the opportunity contact.
- ADDRESS: Enter the Address where the opportunity is located.
- CITY: Enter the City where the opportunity is located.
- STATE/PROVINCE: Select the State/Province where the opportunity is located.
- COUNTRY: Select the Country where the opportunity is located.
- POSTAL CODE: Enter the Postal Code where the opportunity is located.

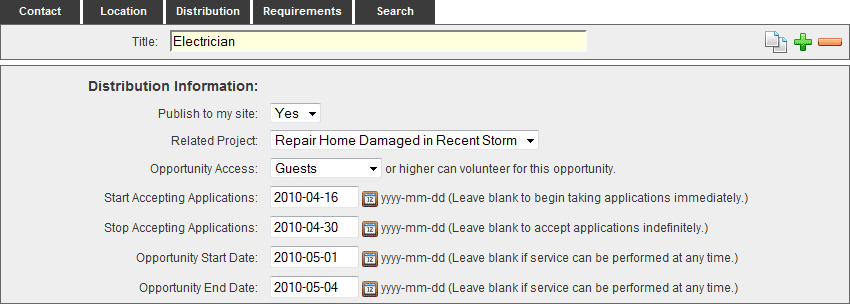
- PUBLISH TO MY SITE: Select "Yes" to publish the opportunity to your web site. Select "No" to leave the opportunity unpublished.
- RELATED PROJECT: If you want to relate the opportunity to a specific Project, select the appropriate Project from the drop-down menu. This will allow you to manage opportunities at once, directly from the Project.
- OPPORTUNITY ACCESS: This allows you to set the minimum security level required to access the opportunity. For more information on setting access, see the People manager as this option will only appear to those who have the People manager.
- Guest: This allows anyone to access the opportunity from your web site.
- Member: This allows only those who have Site Member access or greater to access the opportunity from your web site.
- Contributor: This allows only those who have Site Contributor access or greater to access the opportunity from your web site.
- Editor: This allows only those who have Site Editor access or greater to access the opportunity from your web site.
- Administrator: This allows only those who have Site Administrator access to access the opportunity from your web site.
- START ACCEPTING APPLICATIONS: Click the calendar icon to the right of the Start Accepting Applications field to bring up the interactive calendar and choose the date that you will start accepting applications for the opportunity. Leave the Start Accepting Applications field blank to begin taking applications immediately. Alternatively, you may click inside the Start Accepting Applications field to bring up the interactive calendar.
- STOP ACCEPTING APPLICATIONS: Click the calendar icon to the right of the Stop Accepting Applications field to bring up the interactive calendar and choose the date that you will stop accepting applications for the opportunity. Leave the Stop Accepting Applications field blank to to accept applications indefinitely. Alternatively, you may click inside the Stop Accepting Applications field to bring up the interactive calendar.
- OPPORTUNITY START DATE: Click the calendar icon to the right of the Opportunity Start Date field to bring up the interactive calendar and choose the date that your opportunity will start. Leave the Opportunity Start Date field blank if service can be performed at any time. Alternatively, you may click inside the Opportunity Start Date field to bring up the interactive calendar.
- OPPORTUNITY END DATE: Click the calendar icon to the right of the Opportunity End Date field to bring up the interactive calendar and choose the date that your opportunity will end. Leave the Opportunity End Date field blank if service can be performed at any time. Alternatively, you may click inside the Opportunity End Date field to bring up the interactive calendar.

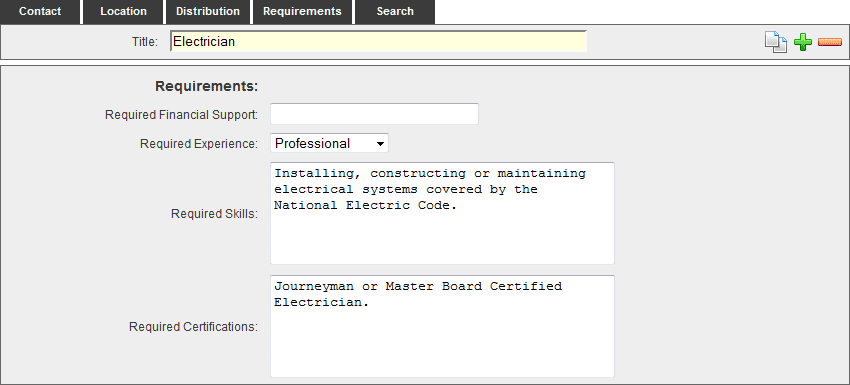
- REQUIRED FINANCIAL SUPPORT: Enter the financial amount required to volunteer for this opportunity.
- REQUIRED EXPERIENCE: Select the minimum experience a person must have to volunteer for this opportunity.
- REQUIRED SKILLS: Enter the skills a person must posses to volunteer for this opportunity.
- REQUIRED CERTIFICATIONS: Enter the certifications a person must posses to volunteer for this opportunity.
- SEARCH SUMMARY: Enter descriptive information to be used for Search Engine data and Site Search data.
- KEYWORDS: Enter descriptive keywords to be used for Search Engine data and Site Search data.
Visitors to your site can search and apply for specific opportunities. The Applications tab allows you to review and accept, or review and decline each volunteer application. Once you accept an application, the tab will then read Volunteer instead of Applications. Should you decide to release the accepted application, the tab will appear as Applications once again.
- Delete an opportunity or opportunities by selecting the check box to the left of the opportunity ID number.
- Click the Delete Selected
 icon. Once an opportunity is deleted, there is not a way to retrieve the opportunity.
- Alternatively, you may click the Delete
 icon within the opportunity itself.
Note: If the opportunity you delete is an opportunity you sponsored, it will be released back into the
Help Requests pool. If the opportunity you delete is one you created, there is not a way to retrieve the opportunity.


