Volunteer Projects
A project is a mechanism used within the
Volunteer manager to organize and manage a group of related
volunteer opportunities. A project is a template used to create default settings for all
volunteer opportunities within a project.
Note: Projects do not appear on your web site.
Who has access:
You must have one of the checked permissions to use this manager.
Guest
Member
Contributor
Editor
Administrator
Volunteer Coordinator
Click the Add New Project

icon.
Note: Project settings serve as the default settings for all volunteer opportunities related to the project.
- TITLE: Enter a title for your project.
- CONTACT NAME: Enter the name of the project contact.
- CONTACT EMAIL: Enter the email address for the project contact.
- CONTACT PHONE: Enter the phone number for the project contact.
- ADDRESS: Enter the Address where the project is located.
- CITY: Enter the City where the project is located.
- STATE/PROVINCE: Select the State/Province where the project is located.
- COUNTRY: Select the Country where the project is located.
- POSTAL CODE: Enter the Postal Code where the project is located.

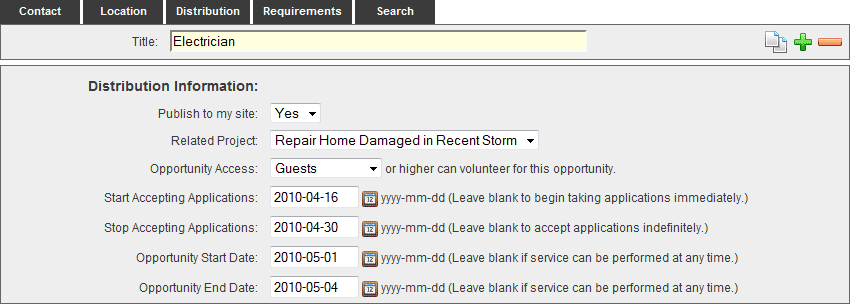
- PUBLISH TO MY SITE: Select "Yes" to publish volunteer opportunities (associated with the project) to your web site. Select "No" to leave volunteer opportunities associated with the project unpublished.
- PROJECT ACCESS: This allows you to set the minimum security level required to access the project. For more information on setting access, see the People manager as this option will only appear to those who have the People manager.
- Guest: This allows anyone who visits your site to access the project from your web site.
- Member: This allows only those who have Site Member access or greater to access the project from your web site.
- Contributor: This allows only those who have Site Contributor access or greater to access the project from your web site.
- Editor: This allows only those who have Site Editor access or greater to access the project from your web site.
- Administrator: This allows only those who have Site Administrator access to access the project from your web site.
- START ACCEPTING APPLICATIONS: Click the calendar icon to the right of the Start Accepting Applications field to bring up the interactive calendar and choose the date that you will start accepting applications for the project. Leave the Start Accepting Applications field blank to begin taking applications immediately. Alternatively, you may click inside the Start Accepting Applications field to bring up the interactive calendar.
- STOP ACCEPTING APPLICATIONS: Click the calendar icon to the right of the Stop Accepting Applications field to bring up the interactive calendar and choose the date that you will stop accepting applications for the project. Leave the Stop Accepting Applications field blank to to accept applications indefinitely. Alternatively, you may click inside the Stop Accepting Applications field to bring up the interactive calendar.
- PROJECT START DATE: Click the calendar icon to the right of the Project Start Date field to bring up the interactive calendar and choose the date that your project will start. Leave the Project Start Date field blank if service can be performed at any time. Alternatively, you may click inside the Project Start Date field to bring up the interactive calendar.
- PROJECT END DATE: Click the calendar icon to the right of the Project End Date field to bring up the interactive calendar and choose the date that your project will end. Leave the Project End Date field blank if service can be performed at any time. Alternatively, you may click inside the Project End Date field to bring up the interactive calendar.

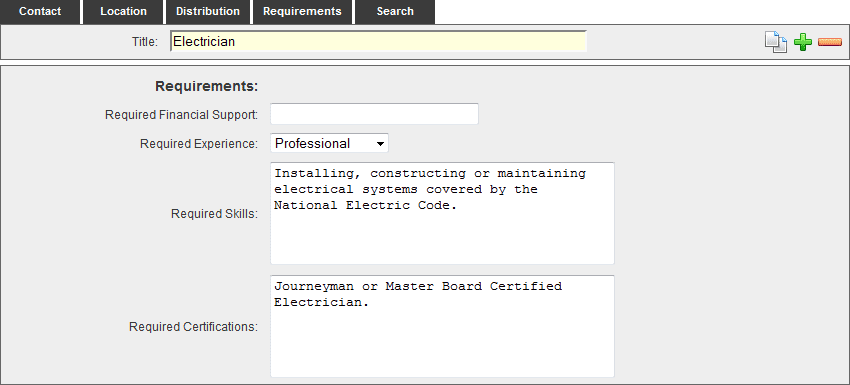
- REQUIRED FINANCIAL SUPPORT: Enter the financial amount required to volunteer for this opportunity.
- REQUIRED EXPERIENCE: Select the minimum experience a person must have to volunteer for this opportunity.
- REQUIRED SKILLS: Enter the skills a person must posses to volunteer for this opportunity.
- REQUIRED CERTIFICATIONS: Enter the certifications a person must posses to volunteer for this opportunity.
- SEARCH SUMMARY: Enter descriptive information to be used for Search Engine data and Site Search data.
- KEYWORDS: Enter descriptive keywords to be used for Search Engine data and Site Search data.
- Add/Edit Project page contents using the Page Editor. These contents should contain a brief description of the project. For help with the functionality of the Page Editor, see Using the Editor for more information.
- Click the Save
 icon in the upper right corner of your screen to save your Project page contents.
Please
click here for detailed information about adding new Volunteer Opportunities.
Note: A volunteer opportunity created within a project will inherit the project default settings. You can override project settings by updating the settings within the opportunity itself.
- Click the project name or id number to open the existing project.
- Click the Show/Hide Page Options icon to expand the project settings.
- Make any necessary updates and click the Save
 icon in the upper right corner of your screen.
- The confirmation dialog box shown above will appear. Click OK to apply the changes you made within the project to all volunteer opportunities related to the project. Click Cancel to only apply changes to the project itself.
- Delete a project or projects by selecting the check box to the left of the project ID number.
- Click the Delete Selected
 icon. Once a project is deleted, there is not a way to retrieve the project.
- Alternatively, you may click the Delete
 icon within the project itself.


